When starting my new server build, the first decision was the case. Initially, I considered a form factor similar to my Synology NAS or the slimline desktop PC server I’m replacing, leading me to explore mini-ITX cases. While there were appealing options, reasonably compact choices were either prohibitively expensive or lacked space for 3.5″ hard drives. Given that this server will replace my NAS, switching to SSDs wasn’t my preference. Furthermore, most mini-ITX boards offered limited or no expansion slots due to their compact, single-purpose design.
Ultimately, I opted for the more versatile and common micro-ATX form factor, which broadened my options considerably. Since I was initially drawn to a cube shape, I continued with that aesthetic and selected a Thermaltake chassis that I find truly impressive. My key requirement for the case was that it had to fit within my wardrobe, either on the small top shelf or the larger lower shelf. This case fits perfectly on the lower shelf with minimal clearance – fortunately, there’s ample space above the narrow opening. So, it’s an ideal fit for the space.
Despite its compact external dimensions, the chassis is surprisingly spacious internally, accommodating a standard ATX PSU, three 3.5″ HDDs, and three 2.5″ SSDs. I can even fit my old GTX 1050 Ti graphics card, which, while not great for gaming, is adequate for video transcoding. What’s particularly exciting is the removable four-panel design, allowing for rotation by repositioning the panel with the rubber feet. It actually looks like an engine. I’m confident it will be a pleasure to build in. Now, the next step is acquiring the components.
“Thank you for sharing with us today, I really enjoyed listening – you spoke so well” – It’s great to receive compliments like this, but even better still it’s great to see the ways in which God has helped me to grow over the last two years – and one of those is public speaking. When I left home two years ago standing on stage was a painful experience – I would break out in a sweat and stammer over my words, looking at my notes for some sort of help. During my time on board I found myself many times being asked to stand on a stage in a church and tell people about the ship or tell them about what God has done in my life. I won’t lie, this terrified me! But I soon realised that His strength is perfect when my strength is gone, so I said to God that I would do my best but He would have to get me through it, and I managed. Now after so many experiences like this, it has become much easier to trust Him. Last night I was speaking at Erina Community Baptist Church and as it was coming time for me to speak, I felt God challenge me to not just tell people what *I* had done, but to tell them what He had done through me. So my notes weren’t as helpful and it didn’t sound very practiced, but in the end God gave me the right words to encourage people that God doesn’t call the qualified, he qualifies the called – and also that He will reveal to us the next step at the right time, not sooner.
So after speaking at Erina and also at Green Point Christian College last Wednesday and at Grace Community Church two weeks ago, this completes my thanksgiving speaking tour. Early next year I will be visiting Churches to tell people what God has in store for me next at OMNIvision. I look forward to that.
In the last blog, I finished off my authentication server in Kotlin. Now it’s time to write a web application to connect to the authentication server to get a token, ultimately to use to consume further content. For this project I’ve chosen to go with React. Introduced by Facebook in 2013, it has steadily gained popularity over the years to the point where it feels like everyone is in React. I’ve had some history with React myself at work, as well as React Native, the bridge to running React on mobile devices natively.
In my last post I did the needful and installed code coverage to tell me if my unit tests were testing enough. You might argue that they might not be very good tests, and I’ve never said that coverage reporting addresses quality, but there are now nearly enough tests.
What I should do now is actually provide some proper functionality! The good thing about this, is we’ll be able to test it all properly too!
Database Entities
Now that we’re getting serious, let’s have some more entities. We’ll need to add Client and Code entities in addition to Users.
@Entity
class User(
        var username: String,
        var password: String,
        @Id @GeneratedValue var id: Long? = null)

@Entity
class Client(
        var name: String,
        var secret: String,
        var redirectUrl: String,
        @Id @GeneratedValue var id: Long? = null)

@Entity
class Code(
        var code: String,
        @ManyToOne var client: Client,
        @ManyToOne var user: User,
        @Id @GeneratedValue var id: Long? = null)
Clients represent the different user interfaces that may seek to authenticate users, and Codes represent the one time codes generated by the Auth service to enable fetching a JWT. Clients should have a fixed redirect URL so that we can be certain we know where we’re sending the one time codes to. The client itself should provide this value as a kind of proof that it is the real deal. I’ve left out obvious properties here like the user’s name and other properties you might add, because our code coverage will report any fields that we’re not actually using as uncovered lines. Neat!
Note the use of @ManyToOne to link to a Code’s Client and User. Amazingly simple.
We’ll also want a couple of smart repositories to hold our queries.
This is really neat. We’re using the magic methods from spring boot’s database engine to do simple queries, but by defining these interfaces we can specify how the implementation should work. My IDE (Intellij) will tell me if the interface I’m writing doesn’t match the actual implementation. For Clients we’re going to use findById which is a concrete method of CrudRepository so there’s no need for a function definition here. Now that we have these repositories we can inject them as dependencies with zero hassle!
And lastly we’ll add some initial data to our app, since this is all development work. (the database is only in-memory while the app runs!) See how easily we inject the repositories!
@Configuration
class AuthConfiguration {
    @Bean
    fun databaseInitializer(
            userRepository: UserRepository,
            clientRepository: ClientRepository,
            codeRepository: CodeRepository
    ) = ApplicationRunner {
        val user = userRepository.save(User("testuser", "testpassword"))
        val client = clientRepository.save(Client("Website", "secret", "https://localhost:3000/login"))
        codeRepository.save(Code("1234", client, user))
    }
}
A JWT Service
Next, Let’s create a service to help us generate JWTs
we can use the https://fusionauth.io package to construct a JWT, add claims to it (the user ID and the client ID just now), and sign it with our secret (a little bit of a hack, let’s remember to use a config option for that later!)
package com.chrisyoung.auth

import io.fusionauth.jwt.domain.JWT
import io.fusionauth.jwt.hmac.HMACSigner
import java.time.ZonedDateTime

class JwtService {
    fun createAccessToken(client: Client, user: User): String {
        val secret = "secret"
        val signer = HMACSigner.newSHA256Signer(secret)
        val jwt = JWT()
        jwt.addClaim("clientId", client.id)
        jwt.addClaim("userId", user.id)
        jwt.setIssuedAt(ZonedDateTime.now())
        jwt.setIssuer("auth-demo")
        return JWT.getEncoder().encode(jwt, signer)
    }
}
Controllers
Now we want some functional controllers so we can go ahead and get that token from the front-end! We’re so close!
We’ll want to fill out the AuthController with the power to actually create those Codes
Our GET method should fetch the client from the database (and handle not-found scenario with an automatic response! Isn’t spring boot awesome!). We’ll add all the relevant information to the page for rendering the HTML (yes this route is traditional HTML rendered server-side)
@Controller
class AuthController(
        private val entityManager: EntityManager,
        private val clientRepository: ClientRepository,
        private val codeRepository: CodeRepository
) {
    private val chars = ('0'..'z').toList().toTypedArray()

    @GetMapping("/authorize")
    fun authorizeForm(
            model: Model,
            request: HttpServletRequest,
            @RequestParam(name = "state") state: String,
            @RequestParam(name = "clientId") clientId: Long
    ): String {
        val client = clientRepository.findById(clientId).orElse(null)
        client ?: return ":notfound"
        request.session.getAttribute("user") as User? ?: return "redirect:/login"
        model["title"] = "Authorize"
        model["clientId"] = clientId
        model["clientName"] = client.name
        model["state"] = state
        return "authorizeForm"
    }
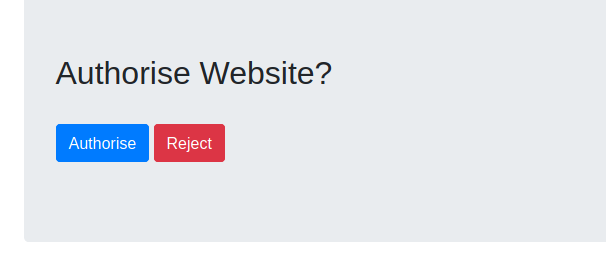
Our form should display all the useful information to the user, and keep the relevant data in the hidden fields for the POST. Clicking the submit button is going to POST the data to the same route and create our secret code!
{{> _header }}
{{> _footer }}
Our POST method should again fetch the client from the database, get the current user from the session, and create a new Code entity record before redirecting to the frontend with the string version of the Code.
    @PostMapping("/authorize")
    fun authorize(
            model: Model,
            request: HttpServletRequest,
            @RequestParam(name = "state") state: String,
            @RequestParam(name = "clientId") clientId: Long
    ): String {
        val client: Client? = clientRepository.findById(clientId).orElse(null)
        client ?: return "notfound:"
        val user = request.session.getAttribute("user") as User? ?: return "redirect:/login"
        val secret = (1..32).map { chars.random() }.joinToString("")
        val code = codeRepository.save(Code(secret, client, user))

        model["title"] = "Authorized"
        model["redirectUrl"] = format("%s?state=%s&code=%s", client.redirectUrl, state, code.code)
        return "authorize"
    }
The most significant parts here are the generation of the unique code (and saving to the database) and the creation of the redirect URL (if all goes well above) from the URL stored on the client record, the state value (a value provided by the client application at runtime representing the unique state at request time, which should be compared when receiving the code to prove the client application can trust the redirect request), and the one time code itself.
The rendered HTML just contains a javascript redirect to the url provided from the controller, and perhaps a nice UI to display while the user waits. You can tell I’m a back-end engineer as I’ve not bothered making it look nice.
{{> _header }}
Redirecting
{{> _footer }}
And here’s some concise tests for the authorize form:
@SpringBootTest(webEnvironment = SpringBootTest.WebEnvironment.RANDOM_PORT)
class AuthControllerTests(@Autowired val restTemplate: TestRestTemplate) {
    @Test
    fun `Assert that the form is displayed`() {
        val entity = restTemplate.getForEntity("/authorize?state=1234&clientId=2")
        assertThat(entity.statusCode).isEqualTo(HttpStatus.OK)
    }
    @Test
    fun `Assert that the redirect happens if not logged in`() {
        val entity = restTemplate.postForEntity("/authorize?state=1234&clientId=2")
        assertThat(entity.statusCode).isEqualTo(HttpStatus.FOUND)
    }
    @Test
    fun `Assert that wrong clientId fails`() {
        val entity = restTemplate.getForEntity("/authorize?state=1234&clientId=1")
        assertThat(entity.statusCode).isEqualTo(HttpStatus.NOT_FOUND)
    }
    @Test
    fun `Assert that wrong clientId fails POST`() {
        val entity = restTemplate.postForEntity("/authorize?state=1234&clientId=1")
        assertThat(entity.statusCode).isEqualTo(HttpStatus.NOT_FOUND)
    }
    @Test
    fun `Assert that the redirect happens`() {
        val loginResponse = restTemplate.postForEntity("/login?username=testuser&password=testpassword")
        assertThat(loginResponse.statusCode).isEqualTo(HttpStatus.OK)
        val sessionCookie = loginResponse.headers.get("Set-Cookie")?.get(0)?.split(';')?.get(0);
        val headers = HttpHeaders();
        headers.add("Cookie", sessionCookie)
        val entity = HttpEntity(headers)
        val result = restTemplate.exchange("/authorize?state=5678&clientId=2", HttpMethod.POST, entity)
        assertThat(result.statusCode).isEqualTo(HttpStatus.OK)
    }
}
Of course we should add some more assertions, but this just demonstrates how easy it is to perform the test.
Next, our TokenController will be a rest endpoint that will actually give us the JWT we’ve been waiting for! All the controller will do is fetch the code from the database (or show not found error) and use the JWT service to create a JWT and return a JSON response with the accessToken and (still dummy) refreshToken and the info about the user.
data class TokenRequest(
        val code: String
)

data class TokenResponse(
        val accessToken: String,
        val refreshToken: String,
        val user: User
)

@CrossOrigin(origins = ["http://localhost:3000"])
@RestController
class TokenController(val codeRepository: CodeRepository) {
    @PostMapping("/token")
    fun createToken(@RequestBody(required = true) tokenRequest: TokenRequest): ResponseEntity {
        val code = codeRepository.findByCode(tokenRequest.code) ?: return  ResponseEntity.notFound().build()
        val token = JwtService().createAccessToken(code.client, code.user)
        return ResponseEntity.ok().body(TokenResponse(token, "refresh-token", code.user))
    }
}
Note the use of the @CrossOrigin annotation to allow browser AJAX requests from different domains (in local development from a port 3000, React’s favourite), and the use of @RestController rather than just @Controller. This does some nice magic around providing a JSON response.
I quite enjoy the easy definition of what a request and a response look like, so that we can strictly type the controller method. A Token Request needs only the one-time code, and a Token Response will only have the JWT (access token), a refresh token, and the user object so we have some info about the user in the response body. We’ll use that later to display a welcome message.
No templates here, it’s a REST controller! Here’s a little test though:
@SpringBootTest(webEnvironment = SpringBootTest.WebEnvironment.RANDOM_PORT)
class TokenControllerTests(@Autowired val restTemplate: TestRestTemplate) {
    @Test
    fun `Get a token successfully`() {
        val headers = HttpHeaders()
        headers.contentType = MediaType.APPLICATION_JSON
        val request = HttpEntity(TokenRequest("1234"), headers)
        val entity = restTemplate.postForEntity("/token", request)
        assertThat(entity.statusCode).isEqualTo(HttpStatus.OK)
    }
    @Test
    fun `Bad code`() {
        val headers = HttpHeaders()
        headers.contentType = MediaType.APPLICATION_JSON
        val request = HttpEntity(TokenRequest("wrong"), headers)
        val entity = restTemplate.postForEntity("/token", request)
        assertThat(entity.statusCode).isEqualTo(HttpStatus.NOT_FOUND)
    }
}
Again only testing the response codes, but roughly I know I haven’t broken the controller entirely.
Let’s also add a Verify endpoint so the client application can check the JWT is (still) valid:
@CrossOrigin(origins = ["http://localhost:3000"])
@RestController
class VerifyController {
    @GetMapping("/verify")
    fun verifiy(
            @RequestHeader(name = "Authorization") auth: String
    ): JWT? {
        val token = auth.replace("Bearer ", "")
        return JwtService().verify(token)
    }
}
I’ll also throw in Twitter Bootstrap for some slightly Nicer styles:
    {{ title }}
+
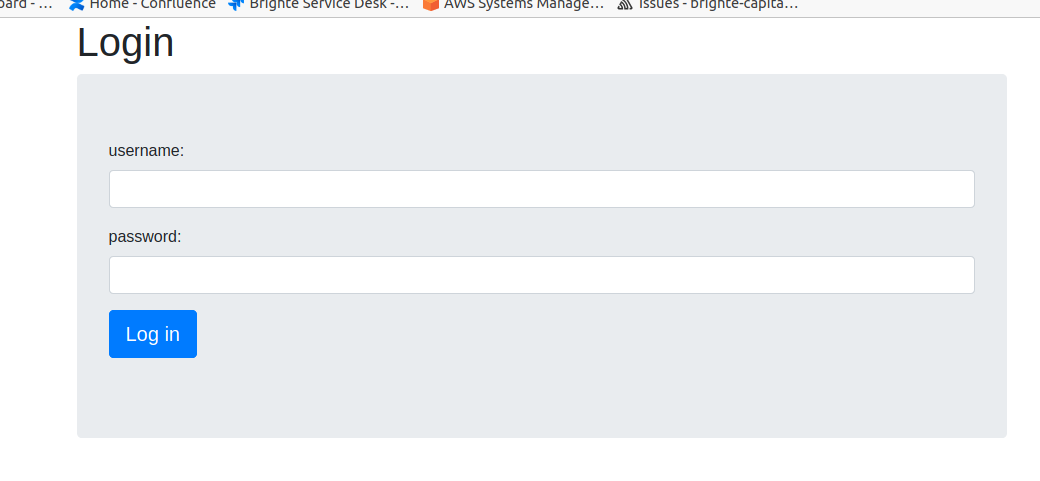
Here’s the login screen:
And the Authorize screen:
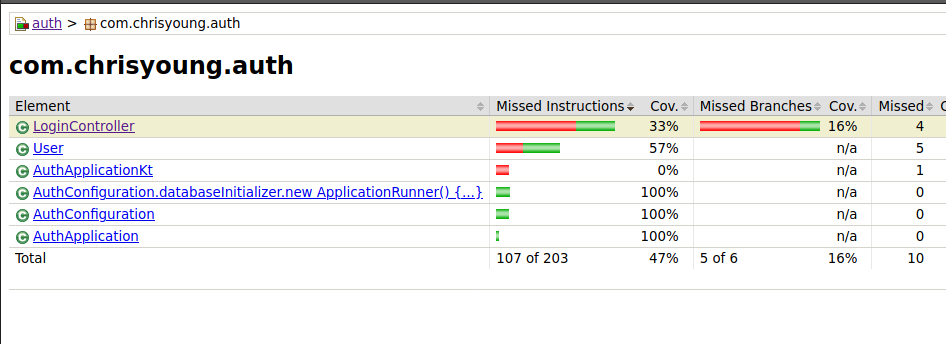
My code coverage is doing alright too
That’ll do for now
In the next blog, I’ll show you the react app I’ve created to log in using these routes.
The base application I generated from the Spring Boot Initializer was a Maven project. I had the option of Maven or Gradle, and I made a quick choice based on my knowledge at the time. You see, I’m a PHP developer. I’m used to there being one dominant package manager, Composer, and not having to make choices about which one to use. My experience with Gradle and Maven has been that Gradle is for Android projects and Maven for Server-side things. It’s not actually that clear cut, it’s just that Google has chosen Gradle to be the official build tool for Android, and maven is the original package manager so older projects run on maven.
I did experience a little bit of this package manager duality when developing JavaScript applications using either the Node Package Manager, or the stand-in replacement Yarn, developed by Facebook’s React team because npm was too slow, but yarn used the same package.json file as npm, so switching between the two only meant losing your package lock file.
Yarn’s biggest claim to fame is speed, and it seems that is what Gradle brings to the table also. Again, as a PHP developer I’m used to my code being interpreted at runtime, rather than being compiled with every code change, and it hadn’t even entered my mind that build speed would be a factor, but golly was I bored watching my application build over and over again to fix simple mistakes I’d made in my code.
The gradle website presents a very convincing demonstration of how much faster Gradle builds are, and that it actively avoids doing unnecessary work. It sings the praises of it’s “work avoidance mechanism”, and shouldn’t we all? I was sold on the promise of faster builds, and the result didn’t disappoint. Have a look here https://gradle.org/maven-vs-gradle/ if you’re interested in more reliable information.
Converting
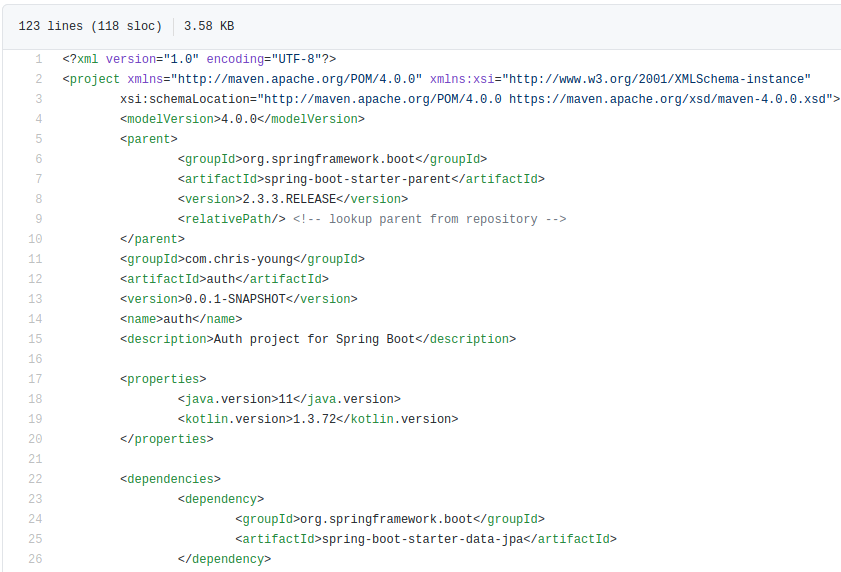
I mentioned earlier the conversion from npm to yarn for an existing project was as simple as running `yarn` instead of `npm i`, but it’s not like that for Gradle, it’s a totally different structure. Maven has it’s pom.xml file that looks a bit like this
And Gradle has a syntax that reminds me a bit of json and a bit of yaml. Apparently it’s a superset of Java and it’s called Groovy.
The thing is that now with the introduction of Kotlin, everyone’s moving from Groovy DSL to Kotlin DSL which uses Kotlin syntax. I guess this is better, but what it means is that documentation is completely fragmented between maven XML, and the two different Gradle formats, and if you ever ask someone for help there’s a 66% chance they’ll tell you in some other syntax and you’ll have to covert it.
Apparently if you just run gradle in a maven repo, Gradle will do the coversion for you. Unforunately this creates a Groovey DSL, and all the kotlin docs give you instructions in Kotlin DSL, plus we need different plugins for Gradle, so it was easier in the end to re-generate the base project from the Spring Boot Initializer and copy in the new files. I ended up with this commit and this DSL
import org.jetbrains.kotlin.gradle.tasks.KotlinCompile

plugins {
	id("org.springframework.boot") version "2.3.3.RELEASE"
	id("io.spring.dependency-management") version "1.0.10.RELEASE"
	kotlin("jvm") version "1.3.72"
	kotlin("plugin.spring") version "1.3.72"
	kotlin("plugin.jpa") version "1.3.72"
}

group = "com.chris-young"
version = "0.0.1-SNAPSHOT"
java.sourceCompatibility = JavaVersion.VERSION_11

repositories {
	mavenCentral()
}

dependencies {
	implementation("org.springframework.boot:spring-boot-starter-data-jpa")
	implementation("org.springframework.boot:spring-boot-starter-mustache")
	implementation("org.springframework.boot:spring-boot-starter-web")
	implementation("com.fasterxml.jackson.module:jackson-module-kotlin")
	implementation("org.jetbrains.kotlin:kotlin-reflect")
	implementation("org.jetbrains.kotlin:kotlin-stdlib-jdk8")
	developmentOnly("org.springframework.boot:spring-boot-devtools")
	runtimeOnly("com.h2database:h2")
	testImplementation("org.springframework.boot:spring-boot-starter-test") {
		exclude(group = "org.junit.vintage", module = "junit-vintage-engine")
	}
}

tasks.withType {
	useJUnitPlatform()
}

tasks.withType {
	kotlinOptions {
		freeCompilerArgs = listOf("-Xjsr305=strict")
		jvmTarget = "11"
	}
}
Code coverage
For code coverage I want to use a service called coveralls. I have chosen a Gradle plugin that will upload reports to that service. To generate those reports we’ll use a Gradle plugin that produces coverage reports from unit tests called Jacoco.
To add the coverage report generator, we simply need to add the plugin here
plugins {
   id("org.springframework.boot") version "2.3.3.RELEASE"
   id("io.spring.dependency-management") version "1.0.10.RELEASE"
   id("java")
   id("jacoco")
   ...
}
The jacoco test report comes out looking like this.
Jacoco test report
This HTML report is very handy for local development – Next we need to enable XML report generation for export into coveralls.
Theoretically all that’s needed is language: java and travis will automatically detect the build.gradle file and use gradle to build and test the repo, but since we want to use a newer version of Java and Gradle than the ones that ship with travis, and we want to do some specific step at the end, it’s better if we are a bit more specific about all the build steps.
Now when we push to GitHub, Travis CI will run the build script and upload the test reports to Coveralls.
resolvconf
install_jdk
Installing oraclejdk11
0.00s
git.checkout
0.44s$ git clone --depth=50 --branch=main https://github.com/darkbluesun/auth-demo-auth.git darkbluesun/auth-demo-auth
0.01s$ export TERM=dumb
cache.1
Setting up build cache
$ java -Xmx32m -version
openjdk version "11.0.2" 2019-01-15
OpenJDK Runtime Environment 18.9 (build 11.0.2+9)
OpenJDK 64-Bit Server VM 18.9 (build 11.0.2+9, mixed mode)
$ javac -J-Xmx32m -version
javac 11.0.2
install
21.04s$ ./gradlew assemble
25.22s$ ./gradlew test build
> Task :compileKotlin UP-TO-DATE
> Task :compileJava NO-SOURCE
> Task :processResources UP-TO-DATE
> Task :classes UP-TO-DATE
> Task :compileTestKotlin
> Task :compileTestJava NO-SOURCE
> Task :processTestResources NO-SOURCE
> Task :testClasses UP-TO-DATE
> Task :test
2020-09-13 02:10:57.345  INFO 4737 --- [extShutdownHook] j.LocalContainerEntityManagerFactoryBean : Closing JPA EntityManagerFactory for persistence unit 'default'
2020-09-13 02:10:57.345  INFO 4737 --- [extShutdownHook] .SchemaDropperImpl$DelayedDropActionImpl : HHH000477: Starting delayed evictData of schema as part of SessionFactory shut-down'
2020-09-13 02:10:57.356  INFO 4737 --- [extShutdownHook] j.LocalContainerEntityManagerFactoryBean : Closing JPA EntityManagerFactory for persistence unit 'default'
2020-09-13 02:10:57.358  INFO 4737 --- [extShutdownHook] .SchemaDropperImpl$DelayedDropActionImpl : HHH000477: Starting delayed evictData of schema as part of SessionFactory shut-down'
Hibernate: drop table if exists user CASCADE
Hibernate: drop sequence if exists hibernate_sequence
2020-09-13 02:10:57.587  INFO 4737 --- [extShutdownHook] o.s.s.concurrent.ThreadPoolTaskExecutor  : Shutting down ExecutorService 'applicationTaskExecutor'
2020-09-13 02:10:57.592  INFO 4737 --- [extShutdownHook] com.zaxxer.hikari.HikariDataSource       : HikariPool-1 - Shutdown initiated...
2020-09-13 02:10:57.623  INFO 4737 --- [extShutdownHook] j.LocalContainerEntityManagerFactoryBean : Closing JPA EntityManagerFactory for persistence unit 'default'
2020-09-13 02:10:57.625  INFO 4737 --- [extShutdownHook] .SchemaDropperImpl$DelayedDropActionImpl : HHH000477: Starting delayed evictData of schema as part of SessionFactory shut-down'
2020-09-13 02:10:57.635  INFO 4737 --- [extShutdownHook] com.zaxxer.hikari.HikariDataSource       : HikariPool-1 - Shutdown completed.
2020-09-13 02:10:57.638  INFO 4737 --- [extShutdownHook] o.s.s.concurrent.ThreadPoolTaskExecutor  : Shutting down ExecutorService 'applicationTaskExecutor'
2020-09-13 02:10:57.639  INFO 4737 --- [extShutdownHook] com.zaxxer.hikari.HikariDataSource       : HikariPool-2 - Shutdown initiated...
2020-09-13 02:10:57.645  INFO 4737 --- [extShutdownHook] com.zaxxer.hikari.HikariDataSource       : HikariPool-2 - Shutdown completed.
> Task :bootJar UP-TO-DATE
> Task :inspectClassesForKotlinIC UP-TO-DATE
> Task :jar SKIPPED
> Task :assemble UP-TO-DATE
> Task :check
> Task :build
BUILD SUCCESSFUL in 24s
6 actionable tasks: 2 executed, 4 up-to-date
The command "./gradlew test build" exited with 0.
before_cache.1
0.00s$ rm -f  $HOME/.gradle/caches/modules-2/modules-2.lock
before_cache.2
0.00s$ rm -fr $HOME/.gradle/caches/*/plugin-resolution/
cache.2
store build cache
after_script
11.19s$ ./gradlew jacocoTestReport coveralls
Done. Your build exited with 0.
Once the coverage report is uploaded it looks like this:
Annotations are extremely powerful in Spring Boot. The @Controller, @GetMapping and @PostMapping annotations are taking care of the routing and request and response handling for us. I admit that they do seem a little bit too magical, but I’ve always enjoyed a bit of magic over a bunch of boilerplate.
in the functions we can see the beautiful strictly typed parameters, including the special parameter “Model” used by the mustache templates below
The application is very simple at this point. The /login route displays a html form with fields for username and password, and when that is submitted, those values are pulled out of the form-encoded request into String-type function parameters which are just displayed on the next page. I’m not actually implementing any login logic here, just request logic. I haven’t started with REST endpoints yet, because I need a couple of actual HTML pages in my auth service for the initial login and the authorisation page.
I also need a couple of templates named to match the return values of the GET and POST mapping above
{{>_header}}
    Login
{{>_footer}}
/resources/templates/login.mustache
{{>_header}}
Logged in
username {{username}}
password {{password}}
{{>_footer}}
/resources/templates/loggedin.mustache
Next I’ll add a bit of logic to make it a bit more functional
‘ve been a PHP software developer for as long as I’ve been developing software. My first taste of programming in university was in PHP, and whilst I’ve developed in Java and Javascript at different points in my career – I do a fair bit of javascript at the moment actually – I’ve always come back to PHP. So since change is like a holiday, I wanted to take some time to learn some new things that are rising in popularity. Furthermore as I journey into the micro-services space, I’m dealing daily with Javascript Web Tokens (or JWTs) to authenticate and authorise requests in my PHP services, and I’m also dealing with their creation.
For this project I wanted to capture the handing of authentication and authorisation by building an auth server, a resource server, and a frontend. The SPA frontend will have a landing page, a login function which will redirect to the authorise page on the auth server, which in turn will redirect back to the frontend with a one time code. The frontend will then fetch an auth token (JWT) using the one time code and client credentials. Finally the frontend will request resources from the resource server using the auth token.
For my two backends I wanted to try something completely new. I hadn’t written anything in Java for a very long time, and I’ve heard very good things about Kotlin since it’s introduction. Kotlin is a superset of Java, adding features many consider to be sorely needed such as strict typing and null handling. I’ve seen it used in Android and desktop applications, but also in APIs. I’ll write both my backend APIs (the auth server and the resource server) in Kotlin with the Spring framework, which appears to be the most popular.
Whilst it would be possible to write my frontend in Kotlin also, I wanted to explore a more popular web application framework, React. I’ve used react, and React Native a fair bit recently, however developers with a front-end focus have spent more time than I on those projects. I also used Redux heavily last time, and I’d rather try to avoid that by using React hooks instead. I’ll write my react app in Typescript, since I highlighted that strict typing was one of the reasons for choosing Kotlin above.
Getting started
Source control
Where am I going to put this code that I’m writing? In a git repo of course! And I prefer github.com for its ease of use and many features. I toyed with the idea of keeping all three parts in the one repository, given that they’re part of one (fairly limited) project, but the way that tools like travis and coveralls work, each thing really needs it’s own repository. Good thing they’re unlimited!
Initialisation
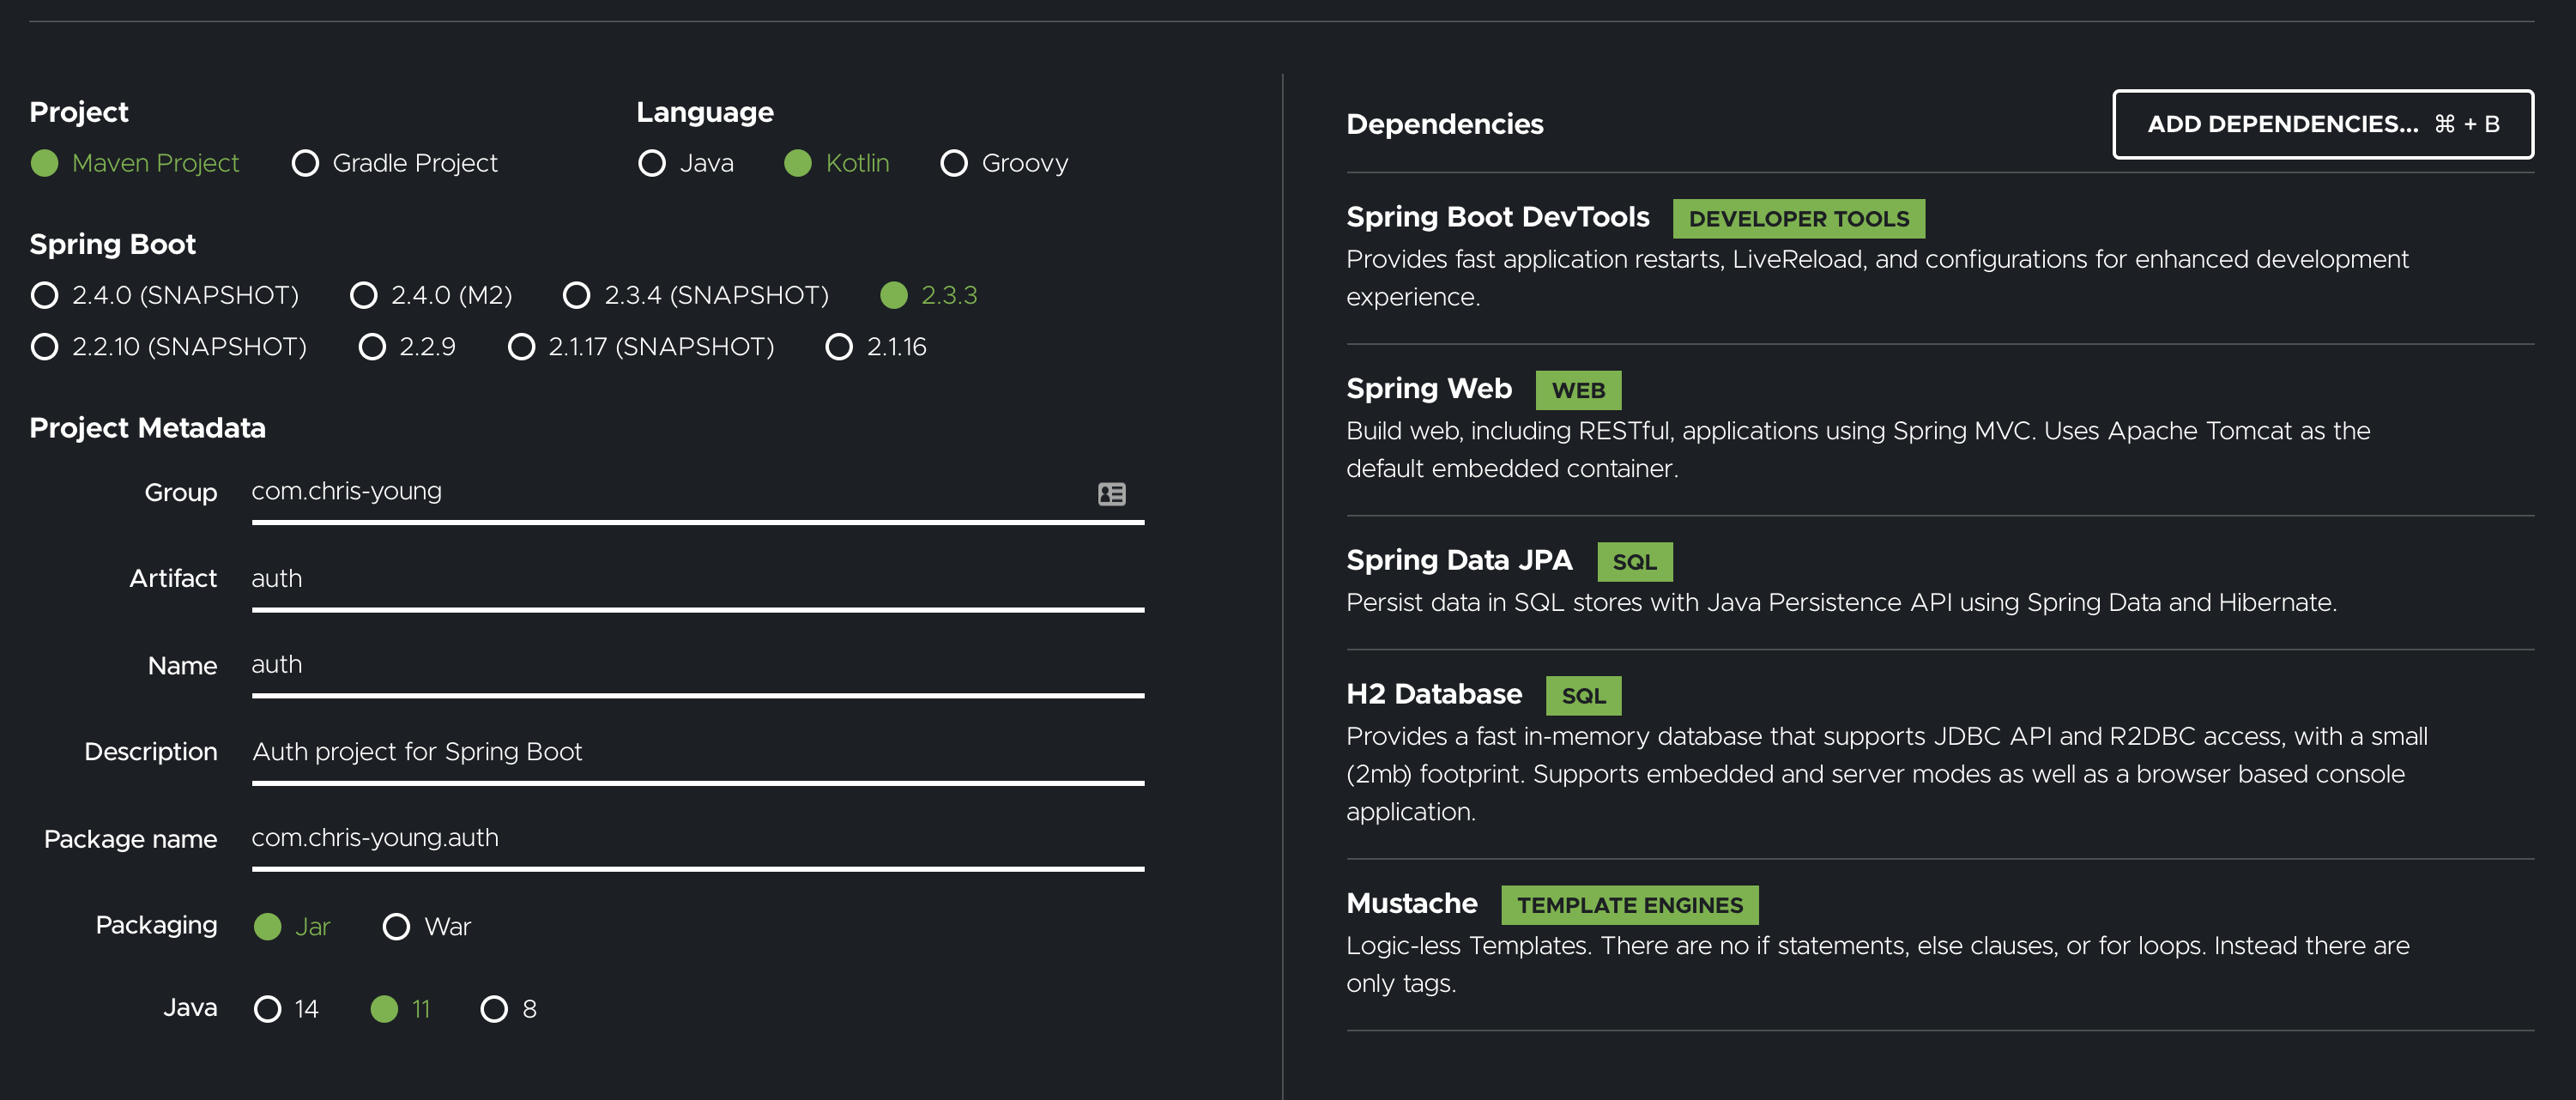
As a PHP developer, I’m accustomed to using composer to spin up a project, and in a similar way using npm or yarn to initiate a javascript project. This project starts a little differently. Since I’m using Spring Framework, the recommended way to proceed is to download a zip file with your starter project inside. Alright, let’s do that!. I went to https://start.spring.io/ to build a starter package. (First I did some language tutorials at https://kotlinlang.org/, but I’ll let you imagine that part).
Spring boot initialiser
I stuck the unzipped files in a folder called auth inside my project folder.
Java Versions
My mac comes with Java 8 / 1.8. That’s not good enough for this project, so I needed to get homebrew to download and install Java 11.
brew tap homebrew/cask-versions

brew cask install java11
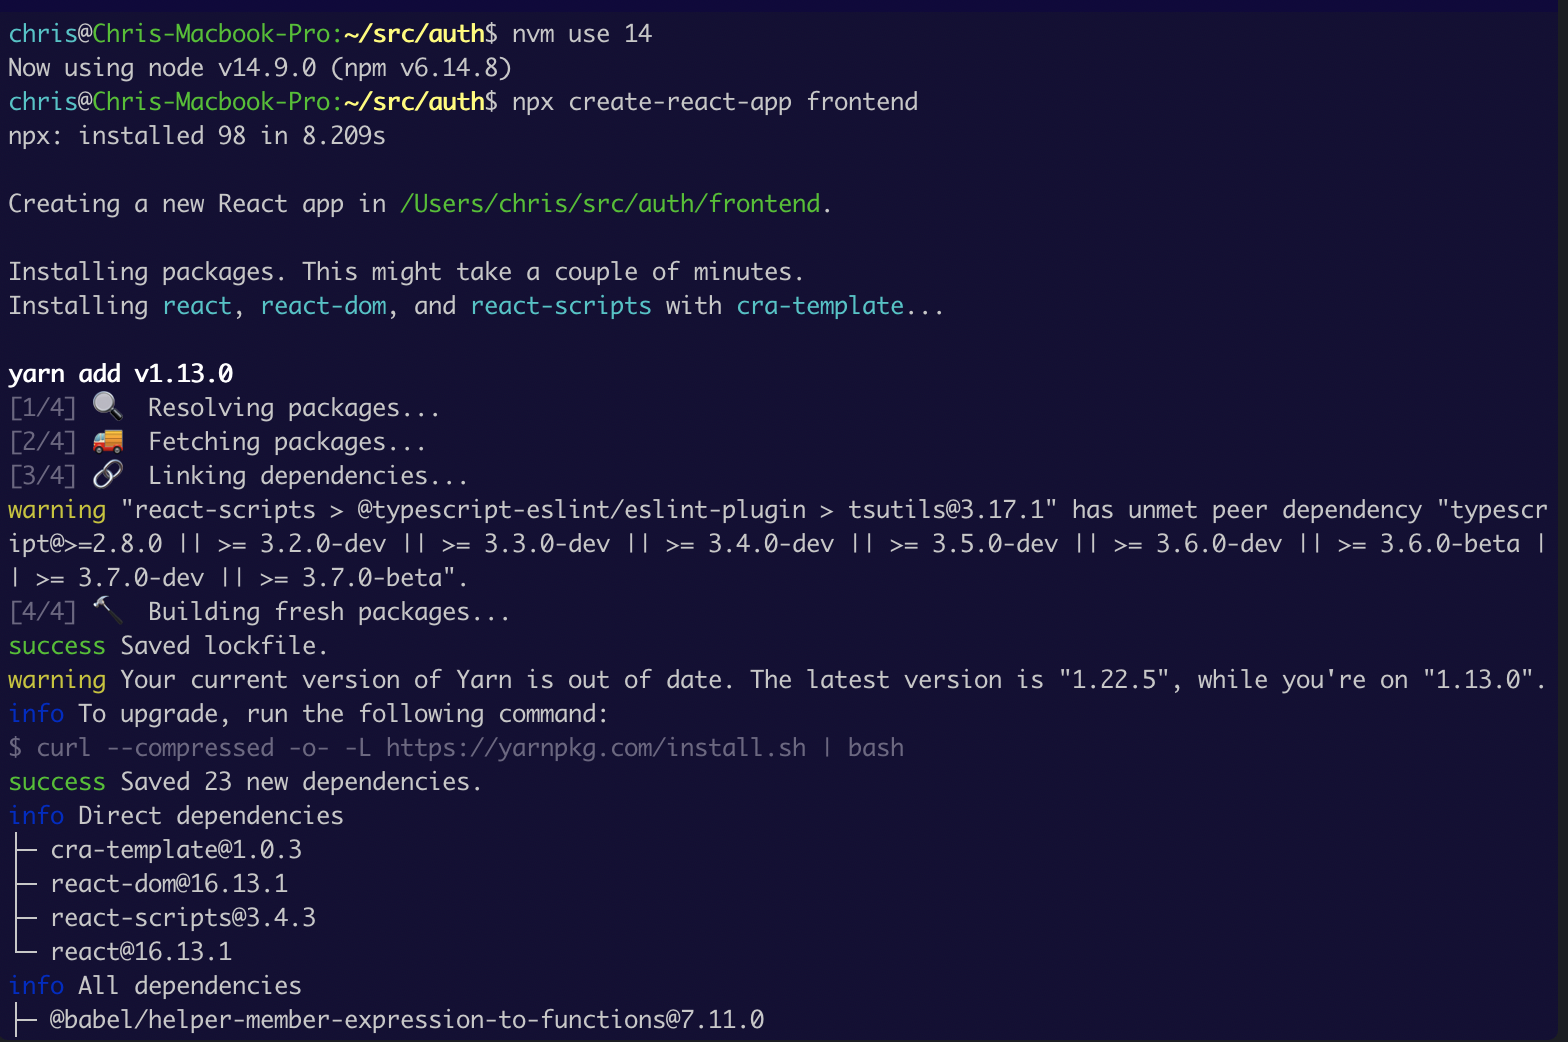
Starting the react project was a bit more of a familiar project. I was accustomed to having the latest react-native-cli installed globally with NPM, but now you just run
npx create-react-app frontend
It’s truely a beautiful process, though admittedly the product you get in the end is much lest customised.
What IDE am I going to use?
A few years ago I got really attached to Jetbrains PHPstorm for php development. The full featured IDE was everything i needed for debugging testing and writing quality code. Of late working on both PHP and Javascript projects I had taken to using vscode for everything. The PHP plugins provided me most of the IDE-type functionality I desired, and the javascript functionality was out-of-this-world. Since I’ll use vscode for the frontend, I assumed that I could continue to use vscode for Kotlin development too, and certainly there was a fair bit of Java and Kotlin support in the community and in the plugin repo, but ultimately I found it unworkable and decided to switch back to Jetbrains IntelliJ IDEA which, thankfully, is free (that is, the community edition is all I need for this project).
I’m very impressed with the experience of IntelliJ IDEA. Especially given how foreign the Java ecosystem is to me at this point. Managing build, dependencies and run is a lifesaver.
IntelliJ IDEA
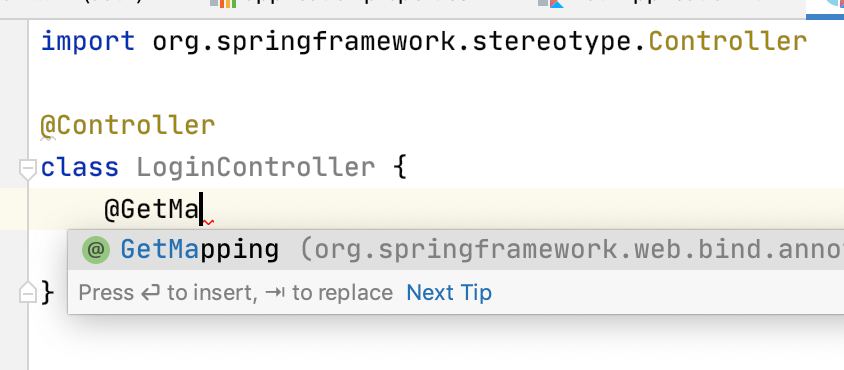
Of course things weren’t perfect at first – until this popup appeared to save the day
Adding it meant that the IDE installed all the dependencies for me, and could auto-import.
I decided I’ve been putting off learning Android development for far too long. I’ve completely avoided the idea like it’s some fad that’s gonna pass when, you know, everyone ditches smartphones. My lack of motivation to try the platform was my absolute lack of ideas as to what to develop. I’m just not one of those people who come up with cool ideas for apps.
Recently though, my personal outrage at a hideous app boiled over and a google search for a public API for the service actually yielded some result. The API doesn’t do exactly what an API should, which kind of explains why the app is so gosh darn awful, but it does work.
The first thing that I discovered when I downloaded and installed Android Developer studio on my mac, was how amazingly similar the interface is to PhpStorm by JetBrains, which I use for developing an app in Symfony2 at work. Obviously they’re based on the same IDE framework, but it really was a shock – they’re almost identical.
The next delightful surprise – remember I’d stuck my head completely in the sand – was that apps are written in Java. Java! I haven’t touched Java since my university days. I’d have to say that it doesn’t seem like a whole lot has changed with Java, but so much with PHP has changed that the two have come a lot closer together. Honestly, it doesn’t feel that different to programming in PHP except, well, it’s not PHP.
On my workplace’s website I’m listed as a “full stack developer” which means I can’t decide what part of the stack to specialise in so I just try to be reasonable at everything. I’ve taken to programming frontends in angular, which has given me a much more up to date understanding of Javascript for frontend development – but this is Java, and it really bears no resemblance to me. Java feels more like PHP, but I’m writing *frontend* code in in, which just feels all wrong. Nevertheless the IDE, the tutorials and good old Stack Overflow practically guided me through the experience in a couple of days.
The next surprise – again, I had no idea what was in store – was that I didn’t have to code in that gosh darn Hyper Text Markup Language that I’ve grown to hate. Instead, there’s a cool visual editor that helps you lock everything in place – and it’s not wishy washy about how it works. You can easily view the XML that it outputs, and adjust it yourself if you like that kind of thing. One thing I can’t do, is make anything look any good – so if there’s a drag and drop editor that let’s me assign actions to buttons, then awesome.
As I said, I found the public facing API documentation on the website for the original app. The system honestly scares me. Authentication for the API is either via an API key which you can only acquire by contacting customer support – and only if you’re the owner of the organisation, not an end user. The alternative is to send your username and password in the query string of every single request – which means that the app has to store your password. When you call the Authenticate endpoint – the system does give you a token, but there’s absolutely nothing in the API documentation about how to use that token to authenticate. What shocked me, is what happens when you stick in invalid credentials. The request returns successfully with a 2xx status code, and a user object with null fields. You have to check if one of the fields is null (and it could be null for other reasons) to detect that authentication has actually failed. Crazy.
So that’s what happens if you send the right fields with the wrong values. Guess what happens when you send the wrong fields? The API documentation says that the default format for responses is JSON, and that you can request XML if you so desire (because you’re insane) and for the most part this is true – but if you happen to not send a mandatory field, or some invalid value that causes an internal server error – you get a HTML Page with the error on it. Just let that sit for a minute. If I want to tell the user why the request failed (admittedly because I malformed the request) then I have to somehow interpret their HTML 500 error page and jam it onto the little phone screen. All I’ve done so far is just dump the raw html onto the screen, because I’m just not touching that.
I recently had to design and implement an API for a SAAS and making sure the app returns the correct status codes and errors in the correct format was possibly more important than getting the API to actually do anything. I honestly can’t see how they missed this.
In any case I had a little bit of fun, and that’s what I set out to do. I might have a go at getting the app good enough to put on the app store – and there are quite a few more features that I’d like to add to it, but I’m pleased that in a couple of days I made an app that functions better than the one my company pays a monthly fee to have access to – even though a couple of days ago I didn’t have a clue how to make an app.
You can check it out here.
https://github.com/darkbluesun/nimbleschedule-android-timeclock
I was delighted yesterday to go for a walk in one of the most beautiful places I’ve ever been. Aira Force is a waterfall in the Lake District in the North of England. I must say it was breathtaking. A great way to spend a Saturday afternoon.
I would have taken my Sony DHC-HX1 semi pro camera on such an excursion but – as so often happens – I pulled it out of the case to find it had no charge left. I guess you just need to leave the battery on trickle-charge and take it out when you want to use it.
Anyway I ended up taking a lot of photos with my Galaxy S3. I’ve never been a fan of smartphone cameras for hobby photography, but to be honest taking photos with this phone was really fun. The colour reproduction and lighting were fantastic, and the camera is so clever that you barely have to touch the controls. Yes, I missed having 20x optical zoom (the S3 has nothing) but there was plenty to take in without zoom.
One design flaw I’ve found about Android phones is that whilst there is now a shortcut to the camera on the lock screen, launching it still requires you to unlock the phone to use it – I believe the iPhone 5 allows you to use the camera without unlocking the phone – this means my wife is already taking photos of that amazing thing while I’m still fiddling with my phone.
But, why complain? The S3 did a fantastic job and meant I didn’t have to haul around my big camera on such a lovely expedition.